
Quick answer: Most astrophotography problems have a short list of causes. Trailed or egg-shaped stars usually come from exposures that are too long for your tracking, poor polar alignment, bad balance, flexure or wind. Gradients come from light pollution and the moon and are fixed with flats plus background extraction. Dew is prevented with heater straps and shields, soft stars are fixed with a Bahtinov mask or autofocus, and poor guiding usually comes down to balance, calibration and backlash, not PHD2 settings. Walking noise is cured by dithering.
As an Amazon Associate, Midwest Astronomy earns from qualifying purchases.
Every astrophotographer has had a night where everything looked fine at the telescope and the data turned out unusable. The good news is that the same problems come up again and again. This guide is organized by symptom, so you can go straight to what you are seeing.
Quick diagnosis table
| Symptom | Most likely causes | First fix to try |
|---|---|---|
| Stars trailed in one direction | Exposure too long, polar alignment, tracking error | Shorter subs, re-check polar alignment |
| Stars elongated only in some frames | Wind, periodic error, cable snag | Shield from wind, tidy cables, discard bad subs |
| Stars elongated in corners only | Tilt, spacing, or field rotation | Check backfocus spacing, then tilt |
| Bright corner or one-sided glow | Light pollution, moon, amp glow | Flats, background extraction, darks |
| Overall haze that grows during the night | Dew on optics | Dew heater and shield |
| Soft, bloated stars | Focus or focus drift with temperature | Bahtinov mask, refocus during the night |
| Diagonal streaks in background | Walking noise from no dithering | Dither every frame or every few frames |
| Dark rings or circles | Dust on filters or sensor window | Flats shot without changing focus |
| Erratic guide graph | Balance, backlash, seeing, flexure | Rebalance, run PHD2 Guiding Assistant |
Problem 1: Star trails and elongated stars
Round stars are the first thing experienced imagers look for. Elongated stars point to a specific set of causes.
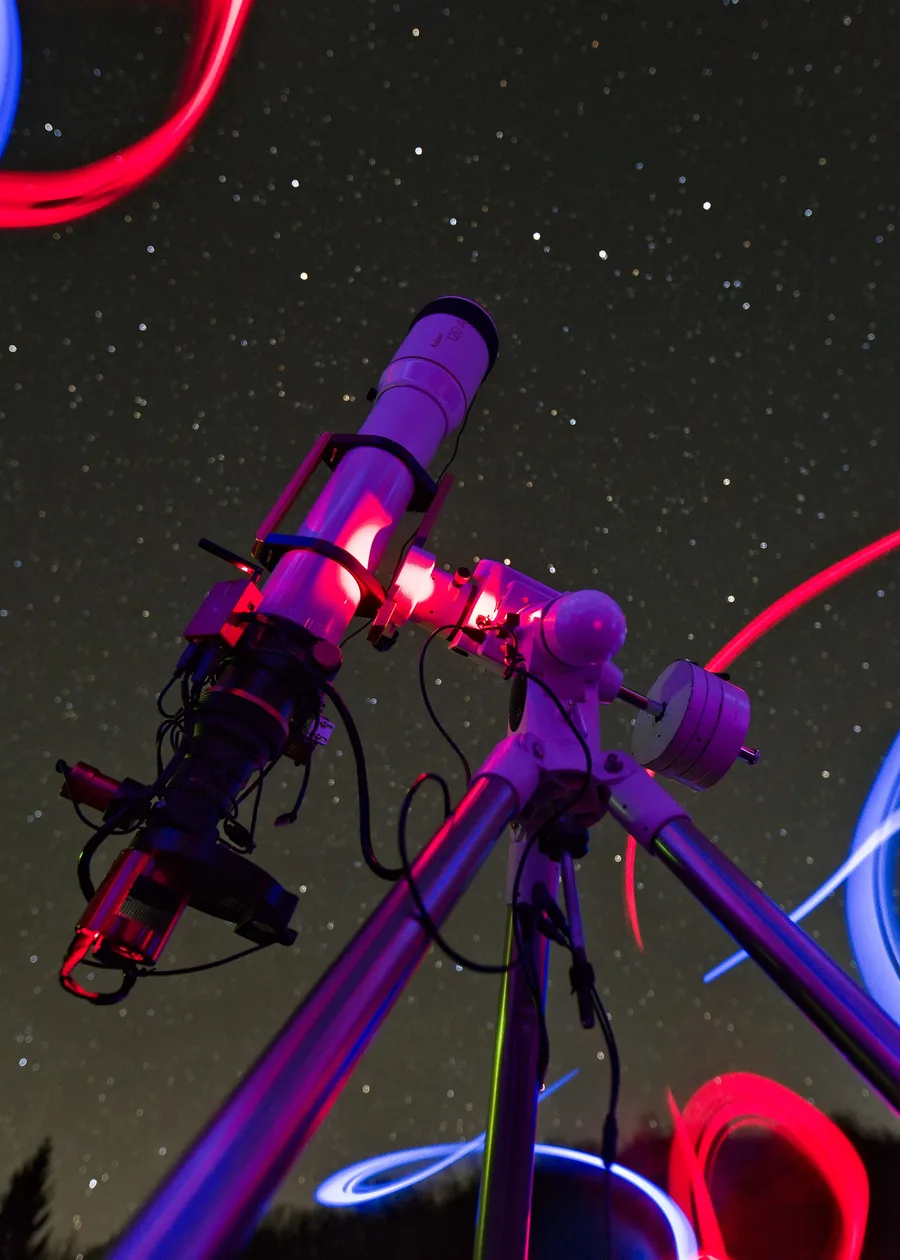
Exposure longer than your tracking can handle
Even on a well-aligned tracker, uncorrected periodic error in the gears eventually smears stars, and longer focal lengths show it sooner. If stars are trailed only on longer lenses, shorten your subs. Total integration time matters more than individual exposure length, so 60 good frames beat 20 frames you have to throw away.
Polar alignment
Poor polar alignment causes slow drift in declination and, in long sessions, field rotation that twists stars at the edges of the frame. Our polar alignment tutorial covers polar scopes, plate-solving tools and drift alignment.
Balance
A mount that is perfectly balanced can wander as the gears float between teeth. Many imagers balance slightly east-heavy in RA so the gears stay engaged, and balance declination carefully with everything attached, including cables and dew heaters.
Wind, cables and flexure
- Wind: even a light breeze can shake a long refractor or a reflector tube. Use a windbreak or shoot on calmer nights.
- Cable drag: loose USB and power cables snag as the mount moves. Route them along the mount with some slack, and use a USB hub mounted on the telescope to reduce the number of cables.
- Differential flexure: with a separate guide scope, the guide scope and main telescope can flex slightly relative to each other over the night. The guide graph looks perfect, but stars trail in the main camera. Tighten guide scope rings, or consider an off-axis guider for long focal lengths.
Untracked shots: exposure rules
On a fixed tripod, stars trail after only a few seconds. The NPF rule (which accounts for aperture, pixel size and focal length) is more reliable than the older “500 rule” on modern sensors. Check your test shot at 100% in the corners.
Problem 2: Gradients and light pollution
Gradients are uneven backgrounds: brighter on one side, in one corner, or toward the horizon. They come from skyglow, the moon, nearby lights or the camera itself.
Prevent at capture
- Shoot targets when they are high. Light pollution is strongest near the horizon, and many Midwest towns produce domes of skyglow that show up in long exposures.
- Use a light-pollution or dual-band filter for emission nebulae, such as the Optolong L-eXtreme for color cameras. Broadband light-pollution filters help less on galaxies.
- Mind the moon. Narrowband imaging tolerates moonlight; broadband galaxy imaging does not.
- Block stray light with a dew shield or lens hood, and avoid shooting toward nearby lights.
Fix in processing
- Flats correct vignetting and dust, which are often mistaken for gradients. An even light source such as a LED tracing panel or a dedicated flat field panel makes flats repeatable.
- Background extraction removes the remaining sky gradient: Siril’s Background Extraction, GraXpert, Astro Pixel Processor’s light pollution removal, or PixInsight’s DBE and related processes. See our stacking software comparison for a step-by-step Siril example.
If gradients look like a bright glow in one corner that is the same in every frame, it may be amp glow from the sensor electronics, which matching dark frames remove.
Problem 3: Dew and frost
Dew forms when your optics cool below the dew point, which happens quickly on clear nights as surfaces radiate heat to the sky. Humid Midwest summer nights are notorious for it, and in winter the same process forms frost. The symptom is a gradual loss of contrast, then halos around bright stars, and eventually a completely washed-out image.
Prevention
- Dew heater straps wrapped around the lens or telescope objective keep the glass slightly above ambient temperature. A dew heater strap is one of the cheapest, most effective accessories in the hobby.
- A dew controller lets you adjust heater power so you do not waste battery or create heat currents. Many power hubs, such as the Pegasus Astro Pocket Powerbox, include dew channels.
- Dew shields slow radiative cooling of the objective and also block stray light.
- Heat the guide scope and finder too. A dewed-over guide scope causes lost stars and guiding failures.
When you pack up
Bring cold gear inside in a closed case or bag and let it warm up before opening. Condensation will form on the outside of the bag instead of on your optics and electronics.
Problem 4: Focus
Soft focus is easy to miss on a small screen and impossible to fix later.
Use a Bahtinov mask
A Bahtinov mask placed over the front of the telescope turns a bright star into a three-spike diffraction pattern. When the middle spike sits exactly centered between the other two, you are in focus.
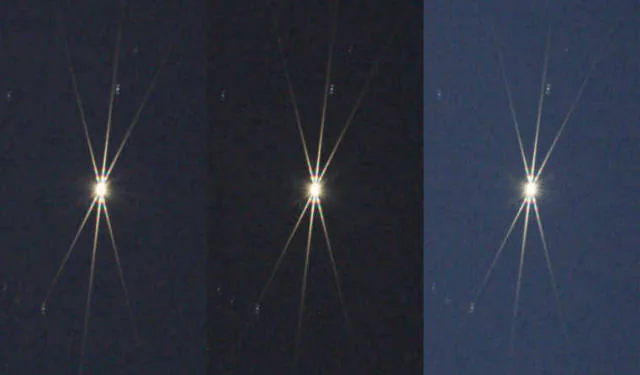
Use HFR or FWHM
Capture software like N.I.N.A., SharpCap and ASIAIR measures star size as HFR (half-flux radius) or FWHM. Smaller numbers mean sharper focus, and they let you compare focus objectively over the night.
Temperature drift
As the night cools, telescope tubes contract and focus shifts. Refocus every hour or after a temperature drop of a couple of degrees, or add an electronic focuser such as the ZWO EAF and let your capture software autofocus automatically.
Camera lenses
Many lenses focus “past infinity,” so the hard stop is not infinity. Focus on a bright star with live view magnified, and tape the focus ring once you have it.
Problem 5: Poor autoguiding
Autoguiding with PHD2 uses a small guide camera, such as the ZWO ASI120MM Mini on a 30mm guide scope, to watch a star and send small corrections to the mount.
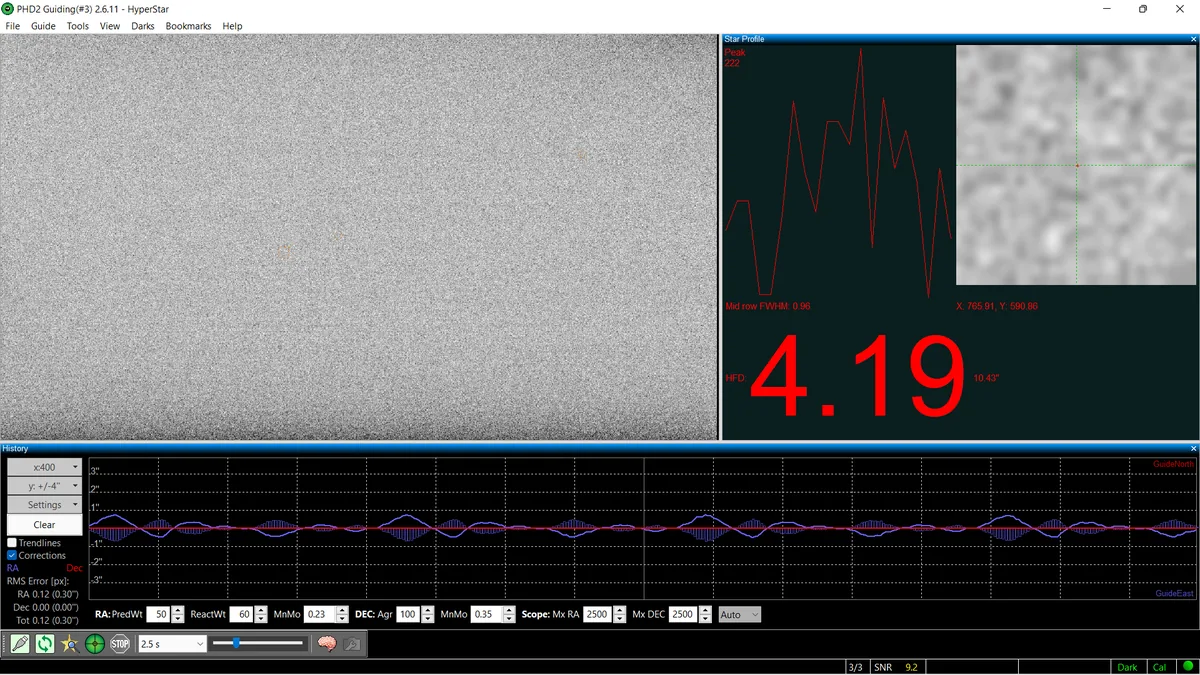
The PHD2 screenshot above shows the main guiding window with the guide star profile and the history graph, where blue and red lines trace RA and declination error over time. Learning to read this graph is the key to fixing guiding problems.
How good should guiding be?
A common rule of thumb is that total RMS guiding error should be about half of your imaging scale in arcseconds per pixel, or lower. If you image at 2″/px, guiding around 1″ RMS is good. At long focal lengths with small pixels, you need tighter guiding.
The usual causes of bad guiding
- Balance and backlash. Check balance in both axes with everything attached. Declination backlash shows as the DEC line overshooting and stalling.
- Calibration. Calibrate near the meridian and near declination 0° for the most accurate result, and recalibrate after rotating the camera or changing the guide setup unless your software accounts for it.
- Seeing. On nights of poor atmospheric seeing, the guide star dances. Longer guide exposures (2–4 seconds) average out the seeing so the mount is not chasing it.
- Guide star selection. Pick a star that is bright but not saturated. Multi-star guiding in recent PHD2 versions helps a lot.
- Polar alignment. Large alignment errors force constant DEC corrections.
Use the Guiding Assistant
PHD2’s Guiding Assistant measures your mount’s behavior and seeing for a few minutes with guiding output disabled, then recommends minimum-move settings and measures declination backlash. Run it on every new setup before tweaking settings by hand.
Problem 6: Walking noise
Walking noise appears as diagonal streaks or “rain” across the background of a stacked image. It happens when the pattern noise of the sensor drifts slowly across the sky between frames because of small tracking drift.
The cure is dithering: moving the framing a few pixels randomly between exposures so pattern noise lands in different places and is rejected during stacking. N.I.N.A., SharpCap, ASIAIR and PHD2 all support dithering. Dither every frame, or every two to three frames for short subs.
Problem 7: Tilt and spacing
If stars are round in the center but stretched in the corners, check these in order:
- Backfocus spacing. Field flatteners and reducers need a specific distance to the sensor, usually listed by the manufacturer. Wrong spacing creates radial elongation in all corners.
- Tilt. If only one side or corner is bad, the sensor is tilted relative to the focal plane. Many cooled cameras include a tilt plate; tools such as the ASTAP or N.I.N.A. aberration inspection features help measure it.
- Optical problems such as pinched optics in cold weather or reflectors out of collimation.
Problem 8: Dust donuts, hot pixels and satellites
- Dust donuts are shadows of dust on filters or the sensor window. Flats fix them, as long as you do not change focus or camera rotation between lights and flats.
- Hot pixels are removed with darks, cosmetic correction and dithering.
- Satellite trails are removed by sigma-clipping rejection during stacking, which works best with many frames.
Cold-weather troubleshooting
Clear winter nights can be excellent, but they bring their own problems:
- Power: batteries lose capacity in the cold. Keep spares warm or use an external 12V power source sized for your mount, camera cooler and dew heaters.
- Cables: cold cables stiffen and pull on connectors. Leave slack and avoid sharp bends.
- Mount stiffness: grease thickens. Let the mount run for a few minutes before guiding calibration.
- Frost on the camera window: cooled cameras can frost internally if their desiccant is saturated; follow the manufacturer’s instructions for drying or replacing it.
A simple pre-session checklist
- Tripod or pier stable, mount balanced in both axes
- Polar alignment completed and re-checked
- Dew heaters on before dew forms, not after
- Focus set with a mask or autofocus, and scheduled refocusing
- Guiding calibrated near the meridian and celestial equator
- Dithering enabled
- Flats planned before changing anything in the imaging train
Building your setup from scratch? Our beginner’s guide and camera comparison cover what to buy.
Frequently asked questions
The most common causes are exposures that are too long for your tracking, poor polar alignment, imbalance, wind and cable drag. If stars are round in the center but stretched in the corners, check field flattener spacing and sensor tilt instead.
Shoot flats to correct vignetting and dust, image targets when they are high, and use a light-pollution or dual-band filter for emission nebulae. Then remove the remaining gradient with background extraction in Siril, GraXpert, Astro Pixel Processor or PixInsight.
Use a dew heater strap with a controller, add a dew shield, and turn the heaters on before dew forms. Heat the guide scope too. When packing up, keep gear in a closed bag until it warms to room temperature.
A common rule of thumb is a total RMS of about half your imaging scale in arcseconds per pixel or lower. For example, at 2 arcseconds per pixel, guiding around 1 arcsecond RMS is good.
Walking noise is fixed-pattern sensor noise that drifts across frames because of slow tracking drift, which creates diagonal streaks after stacking. Enable dithering in your capture or guiding software so frames shift slightly between exposures.
Refocus at least every hour or after a temperature drop of a couple of degrees, and after any filter change if your filters are not parfocal. An electronic focuser with autofocus in N.I.N.A. or ASIAIR handles this automatically.